Simple Optical Heart Rate Monitor: Difference between revisions
Jump to navigation
Jump to search
No edit summary |
|||
| Line 9: | Line 9: | ||
==Setup== | ==Setup== | ||
===Equipment=== | ===Equipment=== | ||
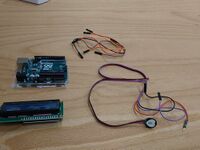
[[File:434011630 1865190630606704 3977716842660802832 n.jpg|200px|thumb|left|Device setup]] | [[File:434011630 1865190630606704 3977716842660802832 n.jpg|200px|thumb|left|Device setup]] | ||
::Pulse Sensor | ::1. Pulse Sensor | ||
::An ear clip | ::2. An ear clip | ||
::Arduino Uno (microcontroller) | ::3. Arduino Uno (microcontroller) | ||
::Jumper wires and cables | ::4. Jumper wires and cables | ||
::16X2 I2C LCD Display | ::5. 16X2 I2C LCD Display | ||
Revision as of 01:40, 21 April 2024
Here are some thoughts about the project
Team members
Yang Meng Ting
Idea
Photoplethysmography is a non-invasive optical technique used in commercial wearables and pulse oximeters to monitor heart rate. Our goal is to reproduce the core concept with a simple DIY device to gain a better understanding of this technology.
Setup
Equipment

- 1. Pulse Sensor
- 2. An ear clip
- 3. Arduino Uno (microcontroller)
- 4. Jumper wires and cables
- 5. 16X2 I2C LCD Display
Circuit Overview

Software
Measurements
Procedure
1. Attach the sensor (LED and photodiode) to a fingertip (or earlobe).
2. Connect to acquisition system (DAQ or microcontroller).
3. Observe the raw PPG signal data.
4. Calculate and display heart rate output.
Expected Results
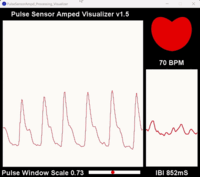
We expect to see a pulsatile waveform corresponding to the heartbeat in the raw data. We can then compare the observed results with those observed by professional heart rate monitor.
Results
